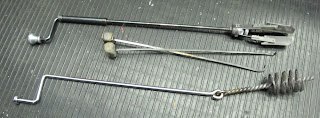
Getting at the keyboard. 1st step: remove the cam yoke frames. They are easy to get to, and cleaning and oiling the key cams is fairly routine maintenance. In fact, the Linotype books will tell to you to clean and oil the cams twice a year.
Here is the keyboard swung open with the front and back cam yoke frames removed. Be careful before swinging the keyboard, make sure there are no key reeds engaged. More on that later.
Here's the rear cam yoke frame before cleaning.
Beginning to remove key cams. It's important to keep these cams in order. Due to position and frequency of use, the key cams will wear slightly differently than others.
One tip to cleaning the cams is to thread each one onto a wire. This way they will stay in order, and you can soak all of them at once. Thanks to Bill Spurling for that one. I like this photo. This is the rear set of cams (indicated by different color wire) Looks like some kind of spinal column. Yes, it is the spinal column of language, the printed word, modern civilization... the backbone of the "art preservative of all other arts..." wooo. Believe me, after cleaning 90 keys over an open tub of white gas, you'll be allowing your mind to flutter off to these fun thoughts as well.

Pictured in the foreground are both cam yoke frames. The cams for the front frame are soaking in white gas. The rubber roller has been removed. At this point I'm debating on replacing the rubber. More on that later, too.
While the keys are soaking and your head is off in la la land, the frames themselves can be cleaned. Here's evidence off gummed up and slow responding triggers.
Testing to see that the triggers move freely. Once this is done, this is when it is necessary to "lock" the triggers into place by inserting a 1/16" wire the length of the frame as the books will describe.
Oooh, look at the teeth on this cam. Problems. This is a good example of why these need to be cleaned. Unfortunately, I didn't count the position of this cam to see if my notes confirmed that this cam corresponded with a key that showed slow response or no response, but you can bet that would be the case. The rubber may have broken down in this position due to oil on the roller. These cams need to be oiled, but only the slightest amount. Clock oil won't gum, but it does run. It's amazing that the tiniest drop will spread a good amount after working the cam a bit. After reinstalling the cams, I let the frames sit over night before returning them to the keyboard so I could remove any remaining extra oil that may have dripped onto the rubber.
Cams clean and scrubbed with brass wire hand brush. Waiting in order to be oiled.
Whoops. A bit too much oil here. My standard procedure was to spin the cam for 20 to 30 seconds until it spins freely. This is something that I got a feel for fairly quickly. Also, each cam really did seem to have slightly different action and feel. Very subtle, but it was noticeable. Often it was the sound of the cam spinning that gave the cam individual feel. Imagine the difference in sound of a june bug vs. a small dragonfly flying past your ear. Something like that. Woo. Maybe the white gas talking again, but it was interesting. The different feel of the cams was due in part to wear, but also it was evidence that this thing was built by a human. Pretty cool.

After the cam is cleaned & oiled, the teeth can be dressed if need be. For the most part, this didn't seem to be necessary. I did attempt to file a couple, but didn't have the correct tool. I tried to use a tiny file used for cleaning automotive ignition points, but it was still a bit too thick. One swipe made a mess of the teeth, so I decided not to butcher any addition ones.
I read that most keyboards contained a space band key cam that was slightly larger than the rest. When I pulled the cams from the frame, I hadn't noticed. After cleaning and oiling 90 cams, it stood out. It's a bit like spotting the queen bee in a full hive of worker bees. Well, kind of. But I think this is easier. I still can't spot that queen bee. Anyway, the space band cam is on the left.
I like this photo, too. Here the cam is resting on the trigger, ready to drop onto the rubber roller (which is still removed allowing for the photo to be taken from this perspective)
Here are the cleaned and oiled cams back in place.


